

Why Most “Budget Kitchen” Guides Fail You
Search “low budget kitchen ideas” and you will find the same recycled advice everywhere — paint your cabinets, buy new hardware, add open shelves. Fine. But none of these guides tell you:
- Which paint actually sticks to laminate cabinets without peeling in 6 months
- What mistakes cause peel-and-stick backsplash to bubble and fall off after 3 weeks
- Why replacing hardware alone sometimes makes a kitchen look worse, not better
- How to plan the order of changes so you do not waste money redoing things
This guide is different. Every idea here comes with honest cost estimates, real difficulty levels, common mistakes to avoid, and the specific sequence that gives you the best results for the least money.
Whether you rent an apartment or own a home, your budget is $100 or $1,000 — there is a practical plan for you below. If you are working on the rest of your home too, our guide to budget-friendly home improvements covers every room.
Before You Spend a Single Rupee or Dollar: The 3-Question Rule
Ask yourself these three questions before buying anything:
1. Is this a cosmetic problem or a functional one? A peeling cabinet door is cosmetic — paint it. A cabinet hinge that does not close properly is functional — fix it first, or your painted door will warp.
2. Will this change still look good in 3 years? Trendy colors and statement wallpapers date quickly. Neutral, timeless choices always win on a budget.
3. Am I fixing a real problem or hiding it? Contact paper over a cracked countertop is fine. Contact paper over a countertop that has water damage underneath will cause mold. Address structural issues first, cosmetic ones second. If you notice signs of moisture damage, read our guide on how to prevent mold in your home naturally before starting any renovation.
How to Set a Realistic Kitchen Budget (With a Real Breakdown)
Most budgeting guides give vague percentages. Here is a concrete breakdown based on common kitchen sizes. According to Better Homes & Gardens, the average full kitchen remodel costs $25,000+ — which is exactly why smart low budget planning matters so much.
Budget Tier 1: Under $200 (The “No Tools” Refresh)
Best for: Renters, small kitchens, quick improvements Focus: Cleaning, organizing, lighting, plants, accessories
Budget Tier 2: $200–$600 (The DIY Makeover)
Best for: Homeowners or renters with landlord permission Focus: Cabinet painting, hardware, backsplash, open shelving
Budget Tier 3: $600–$1,500 (The Full Budget Renovation)
Best for: Homeowners planning a medium-term stay Focus: New faucet, flooring refresh, countertop update, island addition
Use the budget breakdown table below to plan your spending:
| Category | Tier 1 (<$200) | Tier 2 ($200–$600) | Tier 3 ($600–$1,500) |
|---|---|---|---|
| Cleaning & organizing | $20–$40 | $20–$40 | $20–$40 |
| Paint & primer | — | $50–$80 | $50–$80 |
| Hardware | $20–$40 | $30–$60 | $50–$100 |
| Lighting | $20–$35 | $30–$60 | $60–$120 |
| Backsplash | — | $25–$60 | $80–$200 |
| Shelving | — | $40–$100 | $80–$200 |
| Countertop | — | $20–$40 (contact paper) | $150–$400 (laminate) |
| Faucet | — | — | $45–$120 |
| Flooring | — | — | $80–$300 |
| Plants & décor | $20–$40 | $30–$50 | $40–$80 |
The Correct Order of Kitchen Updates
This is the part that nobody talks about — and it is critical. Do things in the wrong order and you will redo work, damage fresh paint, or waste money.
Correct sequence:
- Deep clean and declutter (always first — reveals hidden problems)
- Fix any structural or functional issues (hinges, leaks, loose shelves)
- Paint or resurface (walls first, then cabinets)
- Install backsplash
- Replace hardware
- Update lighting
- Add shelving and storage solutions
- Refresh countertops (contact paper or new laminate)
- Update faucet or sink accessories
- Add final décor (plants, textiles, accessories)
Skipping this sequence is the number one cause of budget overruns in kitchen renovations.
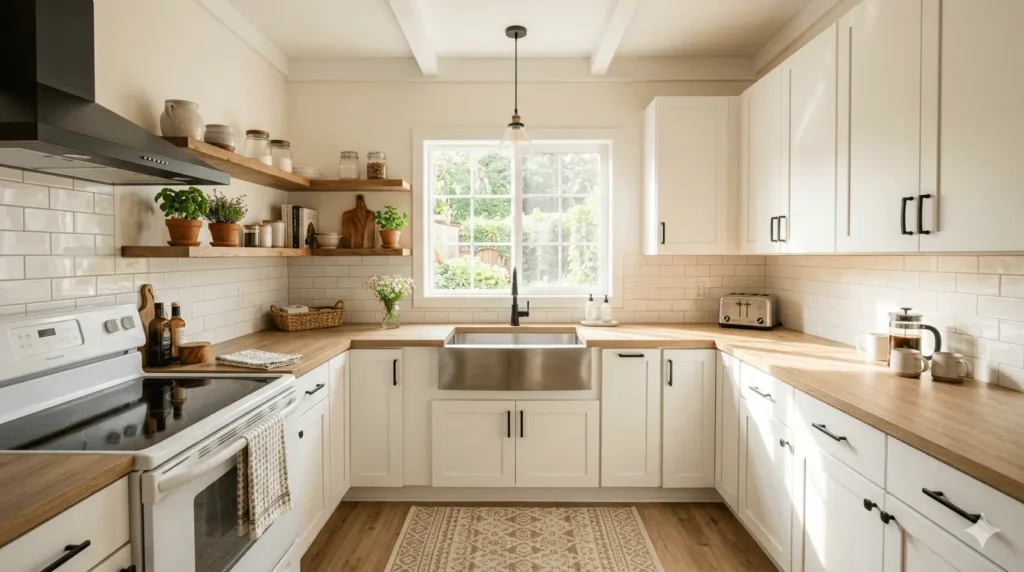
20 Low Budget Kitchen Ideas That Actually Work
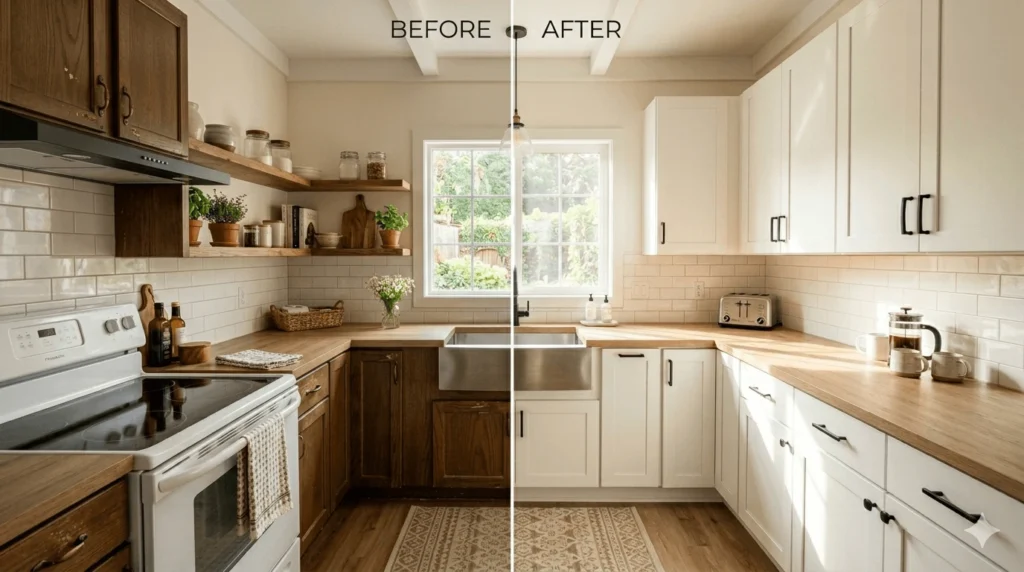
1. Paint Your Cabinets — But Do It Right
Painting cabinets is still the highest-impact low budget kitchen idea. But most guides skip the part that determines whether it lasts 6 months or 6 years. For a complete step-by-step walkthrough, see our dedicated guide on how to paint kitchen cabinets — it covers every tool, product, and technique in detail.
What actually works:
- Degrease first. Kitchen cabinets collect grease that normal cleaners miss. Use a TSP substitute (trisodium phosphate alternative) — $8 at any hardware store. Skip this step and your paint will peel.
- Sand lightly, always. Even if the label says “no sanding required,” a light 220-grit sand makes adhesion dramatically better.
- Use a bonding primer designed for cabinets. General wall primer is not enough. Zinsser BIN shellac-based primer or a similar bonding primer ($18–$25) is the right product.
- Use semi-gloss or satin finish for durability. Matte paint on cabinets scratches and stains easily.
- Apply thin coats. Two thin coats outperform one thick coat every time.
For more expert techniques, This Old House has an excellent guide on professional cabinet painting methods.
Real cost: $45–$75 for primer, paint, foam rollers, and brushes Time: One full weekend (Friday evening through Sunday) Difficulty: Medium — patience matters more than skill
Colors that work across styles: Crisp white (SW Alabaster), warm off-white (SW Antique White), soft sage green, navy blue, charcoal gray
Mistake to avoid: Do not paint over water-damaged or swollen cabinet doors. They need to be replaced first, not painted.
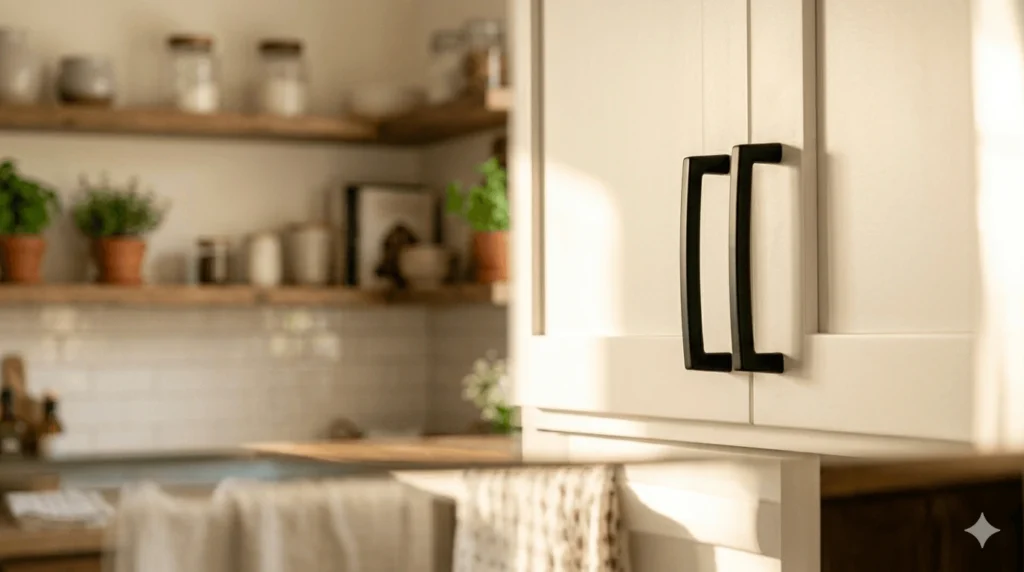
2. Replace Hardware — The $30 Transformation
New handles and knobs are the fastest single change you can make. The key is choosing hardware that fits the existing hole spacing (typically 3 inches or 96mm center-to-center for pulls).
Measure before you buy. Bring a photo of your existing hardware to the store or check the back of the existing pull.
Finishes that work in most kitchens:
- Matte black — modern, hides fingerprints well
- Brushed nickel — versatile, pairs with everything
- Unlacquered brass — warm, trending in 2026, ages beautifully
- Oil-rubbed bronze — traditional, warm kitchen feel
Where to find affordable options:
- Hardware stores often have clearance sections with quality pieces
- Online marketplaces — search “cabinet pulls bulk” for discounts when buying many pieces
- Habitat for Humanity ReStores — genuine vintage hardware at pennies
Real cost: $25–$60 for a full kitchen (assuming 10–15 pieces) Time: 1–2 hours Difficulty: Easy — just a screwdriver
Mistake to avoid: Mixing finishes. Stick to one metal finish throughout the kitchen, including the faucet if possible.
3. Install Peel-and-Stick Backsplash (The Right Way)
Peel-and-stick backsplash has become popular — and widely criticized — because most people install it incorrectly and then blame the product.
Why it fails: Installation on a wall that has not been properly cleaned, or on a textured surface, or in high-heat zones directly behind the stove.
How to do it correctly:
- Clean the wall with isopropyl alcohol (not just soap and water)
- Let it dry completely — at least 30 minutes
- Start from the center and work outward, not corner to corner
- Use a plastic squeegee to press firmly as you go, eliminating every air pocket
- Cut edges with a sharp utility knife and a metal ruler (not scissors)
- Press edges firmly and use clear silicone sealant along the top edge near the stove for heat protection
Best surfaces: Smooth drywall, smooth painted surfaces, smooth tile (not textured) Avoid: Textured walls, areas directly over an open flame
Real cost: $25–$50 for a standard kitchen (10–15 square feet) Lifespan when done correctly: 3–5 years
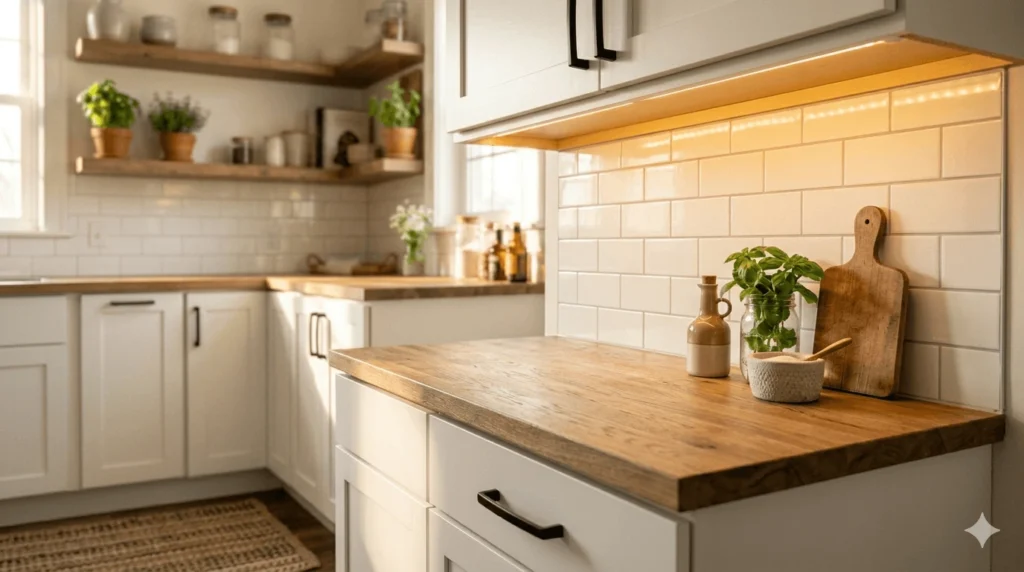
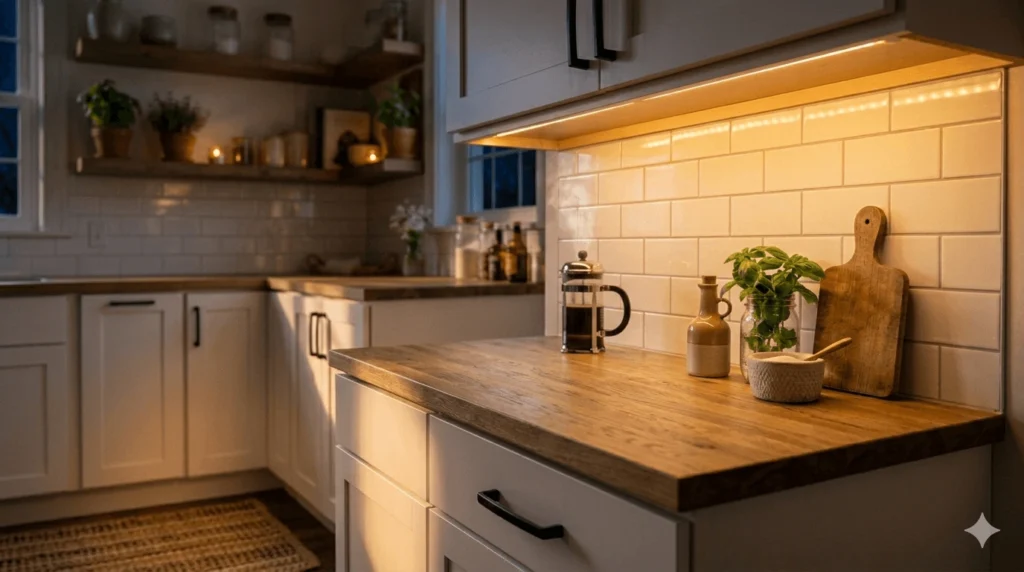
4. Add Under-Cabinet LED Lighting
This single addition does more for a kitchen’s appearance than almost anything else. The right lighting makes everything — cabinets, countertops, backsplash — look more expensive.
What to buy: Plug-in LED strip lights with a warm white color temperature (2700K–3000K). Avoid cool white (4000K+) — it makes kitchens feel sterile.
Installation is simple:
- Stick the strip to the underside of upper cabinets
- Route the cord along the cabinet and down to an outlet inside the cabinet
- A dimmer switch ($10–$15) lets you control intensity
Alternatively: Puck lights are easier to install but give spotty light. Strip lights give even illumination across the entire counter.
Real cost: $20–$35 for a basic kit, $35–$60 for a full kitchen with dimmer Time: 30–45 minutes Difficulty: Very easy
5. Add Open Shelving Strategically
The mistake people make with open shelving is replacing all upper cabinets with shelves. Open shelves require you to keep things organized and attractive at all times. If that is not you, keep most cabinets closed. Our small space interior design tips explain how to balance open and closed storage in compact kitchens.
The smarter approach: Remove just one or two upper cabinet doors and style those as open display shelves. Keep the rest as closed storage.
What to display on open shelves:

- White dishes and bowls (uniform color = automatic elegance)
- A small collection of cookbooks
- One or two plants in simple pots
- Glass jars with dry goods (pasta, rice, grains)
For new floating shelves: Use solid wood (pine is affordable) with simple black brackets. This combination looks expensive and costs very little.
Real cost: $20–$35 per shelf (board + brackets) Difficulty: Medium — requires a stud finder, drill, and level
6. Deep Clean and Organize (Never Skip This Step)
A kitchen that is clean and organized always looks better than a renovated kitchen that is cluttered. This step costs almost nothing but has massive visual impact.
The correct deep clean sequence:
- Empty every cabinet and drawer completely
- Clean inside with warm water and white vinegar
- Clean cabinet fronts with a degreasing cleaner
- Clean the backsplash, stovetop, and hood thoroughly
- Clean inside and behind the refrigerator
- Wipe down all walls, especially near the stove
Declutter rule: If you have not used it in 12 months, remove it from the kitchen. Store it, donate it, or discard it.
Countertop rule: Keep only what you use daily on the counter. Everything else goes in a cabinet or leaves the kitchen.
A completely clear countertop with only a coffee maker and a small plant looks like a magazine kitchen — regardless of how old the cabinets or countertops are.
Real cost: $10–$20 for cleaning supplies Time: Half a day
7. Refresh Your Kitchen Walls With Paint
A fresh coat of paint on the walls is one of the simplest low budget kitchen ideas and often gets skipped because people focus on cabinets. Do not make that mistake. For color inspiration beyond the kitchen, our modern home decor ideas guide shows how to build a cohesive color palette across your whole home.
Paint the walls before you paint the cabinets — if you plan to do both. Wall paint can drip onto cabinets; cabinet paint should be the last fresh surface.
Colors that make kitchens feel larger and brighter:
- Soft white with a warm undertone (avoid pure bright white, which can feel harsh)
- Very light sage or green-gray
- Light warm beige
- Pale yellow in a kitchen with good natural light
One wall of a bold color (a deep green, navy, or terracotta) can add personality without overwhelming a small kitchen — especially on the wall behind open shelves or a window.
Real cost: $25–$45 per gallon (one gallon typically covers a small kitchen)
8. Add a Rolling Kitchen Island or Cart
Counter space is the most common complaint in small kitchens. A rolling cart solves this without any permanent installation. You can even repurpose old furniture — our easy furniture upcycling guide shows how to turn a thrifted dresser into a functional kitchen island.
Best budget options in 2026:
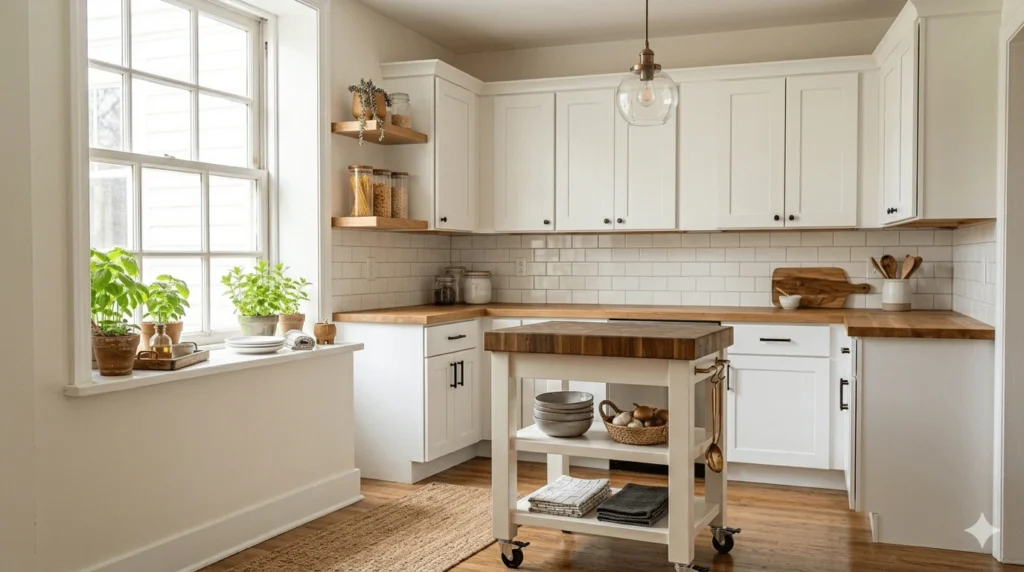
- A simple butcher block top cart with one drawer and two shelves ($80–$120 at most home stores)
- A repurposed antique dresser with a sealed top (check thrift stores and marketplace apps)
- A utility cart with baskets or bins underneath
What makes a cart work well in a kitchen:
- Locking wheels (so it stays put when you are chopping)
- A surface that can be easily cleaned (butcher block treated with mineral oil, or a painted surface with polyurethane)
- Storage underneath for things you need while cooking — pots, cutting boards, mixing bowls
Real cost: $40–$120 depending on option Placement tip: Position it perpendicular to your main counter when using it, and push it against the wall when not needed.
9. Replace or Upgrade the Kitchen Faucet
A dated faucet makes the entire sink area look old. Replacing a faucet is within most people’s DIY ability — no plumber required in most cases.
What you need: An adjustable wrench, a basin wrench (for reaching the nuts under the sink), plumber’s tape, and about 2–3 hours.
What to look for in a budget faucet:
- Brass or stainless steel body (not plastic — it cracks with temperature changes)
- Ceramic disc cartridge inside (lasts much longer than rubber washers)
- A finish that matches your new hardware
Matte black faucets have become very popular and affordable ($45–$90 for good quality). They hide water spots better than chrome.
Real cost: $45–$100 for the faucet, plus minimal plumbing supplies Difficulty: Medium — requires basic comfort working under a sink
When to hire a plumber: If your supply lines are corroded, if your shutoff valves do not work, or if there is any sign of previous water damage under the sink.
10. Use Contact Paper on Countertops
Modern contact paper has come a long way. Marble-pattern, concrete, and wood-grain options look surprisingly realistic — especially from a normal standing distance.
Application tips that prevent bubbling:
- Clean the countertop with alcohol and let it dry completely
- Work from one end to the other, peeling backing gradually (do not peel all at once)
- Use a firm plastic squeegee at 45 degrees to press out air as you go
- Use a hairdryer on low heat to soften the contact paper around curves and edges
- Wrap edges underneath by at least 2–3 cm for a finished look
Avoid putting extremely hot pots or pans directly on contact paper — use a trivet always.
Real cost: $15–$35 for a standard kitchen countertop area Lifespan: 2–4 years with proper care
11. Improve Storage With Smart Organizers
Disorganized storage makes every kitchen look worse. Simple organizers transform how a kitchen feels and functions. For renters especially, our small apartment kitchen organization hacks covers clever no-drill solutions that work without damaging walls.
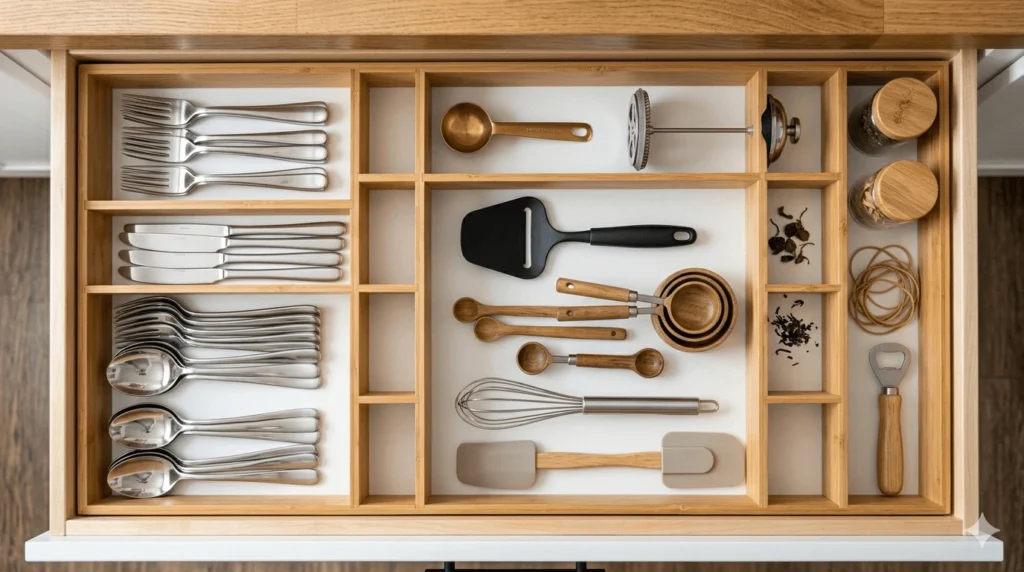
The highest-impact organizers:
- Drawer dividers ($10–$20): Bamboo or plastic, keeps utensil drawers from becoming a jumble
- Lazy Susan turntable ($12–$20): For corner cabinets — eliminates the “I can’t reach the back” problem permanently
- Stackable shelf risers ($15–$25): Doubles the usable space inside cabinets
- Pan lid organizer ($10–$15): Keeps lids vertical and accessible instead of stacked chaos
- Pot rack on wall or ceiling ($25–$60): Frees up an entire cabinet and looks intentional
The organizing principle: Group by task, not by type. Keep everything needed for coffee in one cabinet, everything for baking in another, etc. This reduces the time spent searching and makes the kitchen genuinely more efficient.
12. Upgrade Your Kitchen Lighting Fixture
If your kitchen has one central ceiling fixture from the last decade, changing it is one of the best low budget kitchen ideas.
Budget lighting options:
- Flush mount fixtures: $30–$60 for a modern option
- Semi-flush mount with texture or color: $40–$80
- A single pendant over the sink: $30–$70
Important: Check the existing fixture box. A standard ceiling box can hold up to 50 pounds. Heavier fixtures need a brace or fan-rated box.
Changing a ceiling fixture requires turning off the circuit breaker and basic comfort with electrical connections (wires connect: black to black, white to white, green or bare to ground). If that is not comfortable for you, hire an electrician for just this task ($50–$100 for a single fixture swap).
13. Add Plants Strategically
Plants add life, color, and freshness to a kitchen — and the right ones thrive in kitchen conditions. If you are new to houseplants, our guide to low-light indoor plants for beginners will help you choose varieties that survive even in kitchens with limited natural light.
Best kitchen plants by condition:
| Plant | Light Needed | Notes |
|---|---|---|
| Pothos | Low to medium | Trails from shelves beautifully, impossible to kill |
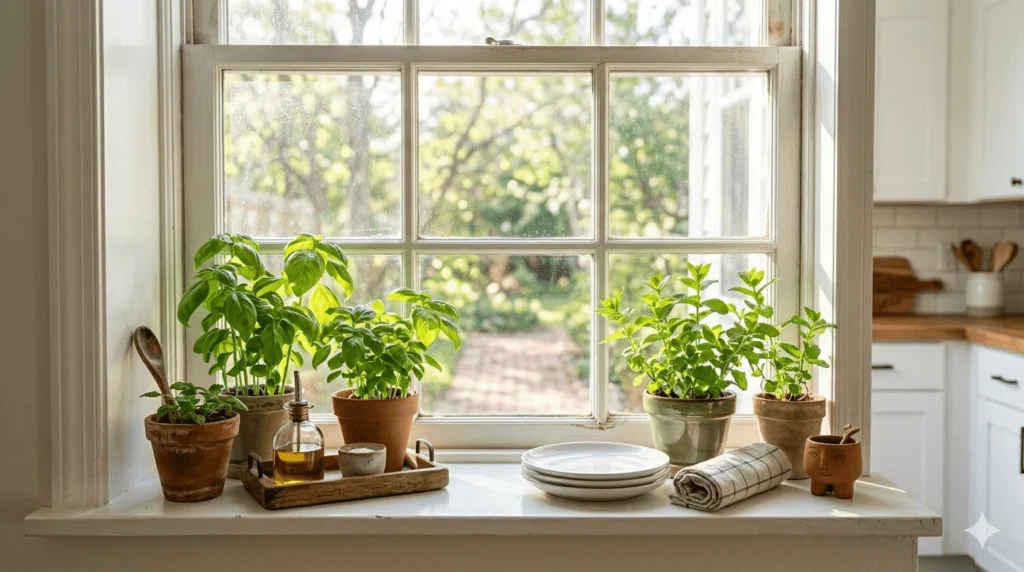
| Basil, mint, rosemary | Bright windowsill | Edible, functional, fragrant |
| Snake plant | Low to medium | Tolerates humidity and temperature changes |
| Spider plant | Medium | Fast growing, great in hanging pots |
| Aloe vera | Bright light | Useful for minor burns, low water needs |
Where to place plants in a kitchen:
- A trailing pothos on top of a high cabinet
- Herb pots on the windowsill (bright light, plus you cook with them)
- A small succulent on a floating shelf
- A trailing plant from a hook above the sink window
Cost: $3–$12 per plant from a local nursery or grocery store
14. Refresh Cabinet Interiors
This is a detail almost no renovation guide mentions — but it makes daily life noticeably better.
What to do:
- Line shelves with a washable liner (cork, foam, or paper — $8–$15 for a roll)
- Paint or contact-paper the interior walls of cabinets in a light color if they are yellowed or stained
- Install a simple LED puck light inside deep cabinets so you can see what is inside
The result: Every time you open a cabinet, you see something clean, organized, and well-lit. This changes the daily experience of your kitchen — even if nothing on the outside has changed.
15. Add a Curtain Under the Sink
Most kitchens have an open area under the sink that reveals pipes, cleaning supplies, and general clutter. A simple curtain on a tension rod fixes this completely.
How to install:
- Measure the width under the sink
- Buy a tension rod that fits ($5–$10)
- Hem a piece of fabric to fit, or use an inexpensive curtain panel
- Install the rod inside the cabinet opening and hang the curtain
Fabric options:
- Linen or cotton canvas — natural, farmhouse look
- A patterned fabric — adds color and personality
- A simple white panel — clean and minimal
Real cost: $10–$25 total
16. Install Floating Shelves Above Empty Wall Space
Most kitchens have wall space near the stove or along a side wall that is completely unused. Floating shelves here add storage and become a focal point.
Best uses for kitchen floating shelves:
- Spice collection (grouped and labeled)
- Small frequently-used appliances
- Cookbooks
- Decorative jars and canisters
Tip for small kitchens: Paint the shelf the same color as the wall. This makes the shelf feel like it belongs and does not visually shrink the space the way a contrasting shelf can.
Real cost: $20–$40 per shelf (board, brackets, and hardware) Difficulty: Medium — requires a drill, level, and wall anchors or stud finding
17. Update Countertop Hardware and Accessories
Small accessories matter. A matching set of soap dispenser, dish rack, and sink mat makes the sink area look intentional and curated.
What to match:
- Soap dispenser
- Dish rack or drying mat
- Paper towel holder
- Compost bin (if visible on counter)
Pick one material for all of these — matte black, brushed stainless, or natural bamboo — and stick to it.
Real cost: $40–$80 to replace all visible sink accessories
18. Paint or Refresh the Floor
If your kitchen floor is worn but structurally sound, painting it is a surprisingly dramatic change.
For vinyl or linoleum floors: Use a floor-specific primer and floor paint. These are designed to flex with the surface and resist foot traffic. Cost: $30–$50.
For concrete floors: Concrete stain in a warm earth tone (terracotta, gray, warm beige) gives a beautiful and durable finish. Cost: $40–$70.
For old tile floors with stained grout: Grout paint ($15–$25) can transform the look of dated tile without replacing it. Apply with a small brush along each grout line — time consuming but very effective.
For wood floors: Refinishing requires sanding and staining — best left to professionals unless you have experience. But a thorough cleaning with a wood-appropriate cleaner and a refresher coat of polyurethane ($20–$30) can make old wood floors look much better.
19. Create a Chalkboard or Memo Wall
A small section of chalkboard paint on one wall (or the inside of a cabinet door) adds personality and function — grocery lists, recipe notes, meal plans.
How to apply chalkboard paint:
- Prepare the surface with light sanding and primer
- Apply 2–3 coats of chalkboard paint, allowing each to dry fully
- “Season” the surface before first use: rub a piece of chalk flat across the entire surface, then wipe clean. This prevents permanent ghost marks.
Real cost: $15–$20 for a small can of chalkboard paint (covers approximately 15 square feet)
20. Style the Kitchen — The Final Layer
The difference between a renovated kitchen and a beautiful kitchen is styling. This is the layer most people skip, and it is also the cheapest. The same principles apply throughout your home — our kitchen interior design ideas guide goes deeper on how professional designers approach kitchen styling on a budget.
Kitchen styling principles:
- Odd numbers: Group items in threes or fives — this is more visually pleasing than pairs or even numbers.
- Vary heights: When arranging items on a shelf or counter, use a mix of tall, medium, and small objects.
- One tray rule: Place a small tray on the counter and keep only 3–5 items on it. This creates a curated look rather than random clutter.
- Cohesive colors: Limit the visible color palette to 2–3 colors. Your dishcloth, dish rack, and plant pot should all feel like they belong together.
- Negative space: Leave empty space deliberately. Not every shelf needs to be full.
Real cost: $0–$30, mostly using what you already own, rearranged thoughtfully.
The Most Common Low Budget Kitchen Mistakes (And How to Avoid Them)
Mistake 1: Not Priming Before Painting Cabinets
Primer is not optional. Without a bonding primer on cabinets, paint peels within weeks. Always prime — even if the paint label says you do not need to.
Mistake 2: Buying the Cheapest Hardware
There is a difference between affordable and cheap. Lightweight, hollow hardware that wobbles after one month undermines everything else you have done. Spend slightly more on hardware with solid weight and a durable finish.
Mistake 3: Ignoring Lighting
The most beautifully painted kitchen will look dull under bad lighting. Lighting is always part of the renovation, not an afterthought.
Mistake 4: Moving Plumbing or Electrical
This turns a $300 project into a $3,000 project. Work with your existing kitchen layout. The Kitchen Work Triangle (the relationship between your sink, stove, and refrigerator) is efficient because it keeps travel distances short — do not disrupt it.
Mistake 5: Overcrowding After Renovating
After spending effort on a kitchen, there is a temptation to fill every surface with things. Resist this completely. Empty countertops are a key part of a beautiful kitchen.
Mistake 6: Working Without a Sequence
Doing things out of order — for example, painting walls after installing a backsplash, or replacing hardware before painting cabinets — creates extra work and can damage new finishes.
Mistake 7: Skipping the Deep Clean
Starting any renovation without a thorough deep clean first means you are renovating over grease, grime, and hidden problems. Always clean first.
What Is the Cheapest Way to Build a Kitchen From Scratch?
If you are starting completely from scratch, this same budgeting mindset applies to the whole house. Our professional interior design consultation guide explains when it makes financial sense to bring in an expert versus doing it yourself.
Cabinets: Ready-to-Assemble (RTA) cabinets cost 40–60% less than custom or semi-custom. They come flat-packed, and you assemble them yourself in a weekend.
Countertops: Laminate countertops have improved dramatically. Modern options realistically mimic granite, marble, and quartz at a fraction of the cost. Starting around $20–$30 per square foot installed.
Appliances: Mid-range appliance packages (refrigerator, stove, dishwasher) perform as well as premium brands for everyday cooking. Look for package deals at appliance stores — buying together saves significantly.
Sink: A drop-in stainless sink is the most affordable option and easiest to install. Starts around $60–$80.
Flooring: Ceramic or porcelain tile is durable, easy to clean, and available from $1–$3 per square foot. Install it yourself to save the labor cost.
The Kitchen Work Triangle — Why It Matters on a Budget
The Kitchen Work Triangle is the design relationship between your three main work stations: the refrigerator, sink, and stove. For efficient cooking, each leg of the triangle should be 4–9 feet, with a total perimeter of 12–26 feet. kitchen planning resource explains this concept in more depth if you are designing a layout from scratch.
Why this matters for your budget: Moving any of these three elements requires moving plumbing lines and electrical connections — and that is where renovation budgets collapse. A faucet or stove that seems just slightly in the wrong place costs thousands to move correctly.
The budget-smart approach: Accept your kitchen’s existing layout and optimize everything around it. The triangle is almost certainly fine — you just need to improve the space within it.
Take the Budget Mindset to the Rest of Your Home
Once your kitchen is refreshed, the same low budget principles apply everywhere. Start with our low budget bathroom makeover ideas for your next project, or explore small space interior design tips for living rooms and bedrooms.
For renters who want to add personality without losing a deposit, our affordable wall decor ideas for renters guide is a great next read.
Frequently Asked Questions
Q: What is the cheapest single thing I can do to improve my kitchen? Deep clean and declutter it. Cost: under $15. Impact: dramatic. A clean, clear kitchen always looks better than a renovated messy one.
Q: Can I renovate a kitchen for under $500? Yes. Painting cabinets ($50–$75), new hardware ($30–$50), peel-and-stick backsplash ($30–$50), under-cabinet LED lights ($25–$35), fresh wall paint ($30–$45), and plants ($15–$25) together come to $180–$280 in materials — and the result is a kitchen that looks genuinely transformed.
Q: How long does a budget kitchen renovation take? A simple refresh (cleaning, painting, hardware, lighting) takes one full weekend. Shelving installation adds another half day. Faucet replacement adds 2–3 hours. A full budget renovation including all 20 items in this guide would take 3–4 weekends spread over 4–6 weeks.
Q: Is painting kitchen cabinets worth it? Yes — if done correctly. Properly primed and painted cabinets can last 5–8 years before needing a refresh. Painting done without proper preparation may last only 6 months.
Q: Do peel-and-stick backsplash tiles actually hold up? Yes, when installed correctly on a smooth, clean surface. The key failures are: not cleaning the wall with alcohol first, pressing onto textured surfaces, or installing in areas with direct high heat. Done right, they last 3–5 years.
Q: What is the best color for budget kitchen cabinets? White and off-white remain the safest choices — they brighten any space, go with any countertop, and never look dated. Soft sage green is the trending choice for 2026. Navy blue works beautifully in kitchens with good natural light.
Q: Can I renovate my kitchen without any contractor? For most of the items in this guide, yes. Painting, hardware, backsplash, shelving, lighting fixtures, and organization are all within DIY ability. The exceptions: plumbing changes beyond faucet replacement, electrical panel work, and any structural modifications.
Q: How do I make a small kitchen look bigger without spending much? Three things, in this order: declutter the countertops completely, paint walls and cabinets a light color, and add better lighting. These three changes cost under $150 and make a dramatic difference in perceived space.
If you have questions about applying these low budget kitchen ideas to your specific situation, leave a comment below with a description of your kitchen and your budget. I will give you a specific plan.